Showing posts with label craft. Show all posts

Friday, March 26, 2010

Friday Finds

This week for Friday Finds I've been looking for things you can do with cans, both aluminum and tin cans.  Of course most municipalities have curbside pick up for cans, some states even have a deposit to return cans and bottles.  Recycling is a great option, but the 3 Rs are Reduce, Reuse and Recycle, so I always like to find interesting and fun ways to reuse items before they go into the recycle bin.


Here's a neat one from Little House in the Suburbs to make these leaf ornaments from aluminum cans.  There are more photos over on the site and they look beautiful adorning her holly bush


10th Muse Studios used the same concept to show us all how to make some cute pop can flower magnents at her blog
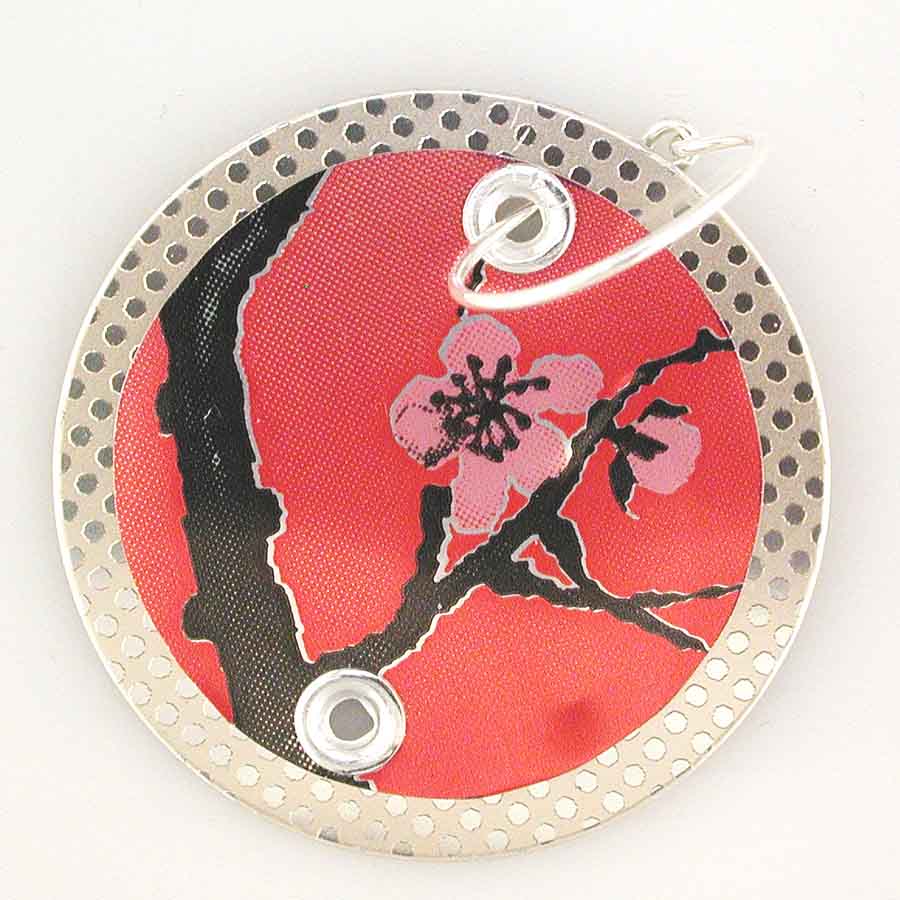


The new new blog has a great tutorial to use aluminum cans for pendants and jewlery. 


This one's not a tutorial, but it's a fabulous Haute Coutoure dress made from all kinds of recycled materials including cans, labels, bottles and bags.  I surely wouldn't want to wear it, but it's always neat to see this artistic visions done with recycled materials.  I wonder how much this dress weighs??


Susan Beal at Craft Stylish has shared her idea to recycle cans along with wire and beads to make pretty little hanging baskets for a spring birthday or garden party.  I love this idea your decorations are recycleable and reusable and living flowers!  Great idea Susan!
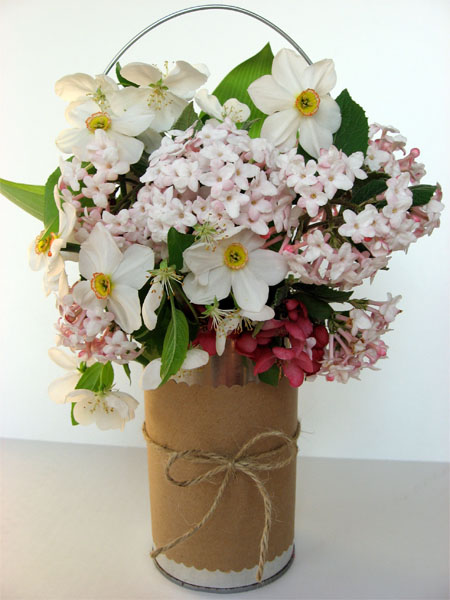


Remember May Day when you were a young girl?  I do!  I loved making those little paper baskets and filling them with whatever flowers were within my reach.  I wonder if those neighbors ever asked themselves how many of the flowers in my little May Day gift basket were harvested in their own yard?  :0)

Here's another use for a recycled can from Skip To My Lou.  You can do this one with your own children or grandchildren and pass the tradition of May Day on to a new generation, while teaching a valuable lesson in recycling and reuse too!


Lady Gaga actually wore hers out and about, but you can use cans as hair rollers to form big beautiful curls.


Martha Stewart has a really cute "robot dog" idea that you can make from tin cans.  He's even got little roller feet, so your little ones can take him for a walk!  Very very cute!


You can even make your own camp out cook stove with these video instructions!

I'm sure there are a lot more fun, useful and intersting ways to repurpose cans.  Do you have some good ideas or links for this type of project?  Share them with us in the comments!


Friday, March 19, 2010

Friday Finds

This week I've been thinking a lot about all those plastic bottles.  We try to buy things in glass whenever we have a choice, but so much of what we use comes in plastic bottles.... juice, syrup, mayonaise.... seems like almost everything is packaged in plastic bottles!  Fortunately our area has an extensive curbside recycling program that includes many types of plastic, but even still I thought it might be fun to look at some plastic bottle reuse craft projects.


Building Nemo
Here's a fun one for the kids that I found over at National Wildlife Federation.  It requires some adult help, but is a great opportunity to talk with your children or grandchildren about reuse and recycling.  Also a great lead in to talk with older children about the North Pacific Garbage Gyre and the problems of plastic pollution. 


Here's another rainy day project for kids, or doctor these up for a more adult theme. 


Here's some reused bottle crafts for the garden

Mr Brown Thumb shows us how easy it is to start seeds in a plastic bottle seed starter


Make a full size greenhouse using recycled plastic bottles.  It can be done, these kids did it!


The Family Corner has easy instuctions for turning a 2 liter bottle into a bird feeder with a perch


Water your tomato plants slowly and directly to the root. Poke holes around a plastic bottle ( I like a 2 liter for this)  bury the bottle into the ground along with your tomato transplants.  Now when you water, fill the bottle and the water will seep out the holes directly at the root of your tomato plants.  This will also help prevent blight which can happen when you get water on the foliage of your tomato plants.


Create a Cloche.  Cut the bottom off of a plastic bottle, then when you put out your transplants, cover them with this "dome" of plastic to form a cloche (greenhouse effect).  Be sure to remove this as the plant matures and the weather gets warm.


Instructables has a great tutorial for an herb garden grown in plastic bottles


I haven't tried this one, but anything to keep the slugs out of my garden is worth a try.  My Zero Waste has a blog post with video to make a slug collar for your seedlings


Make your own "wall of water" plant heater.  Fill jugs with water and arrange them in a ring around plants. When the weather warms, use the water in the jugs to water your garden and save jugs to use in the late season to extend your growing season .


Problem with wasps or yellow jackets in your
yard?  Try making this do it yourself wasp trap using a plastic bottle.


Thursday, March 04, 2010

Friday Finds

Friday Finds is an idea I had to bring you some of the fun, interesting and exciting things that I come across throughout the week while surfing the web.
This week I've been looking at a lot of sites with recycle crafts hoping to find some new uses for items that might otherwise wind up in the trash, so for this first installment of Friday Finds I thought I'd show you some recycle themed projects that I've found in my never ending web adventure.


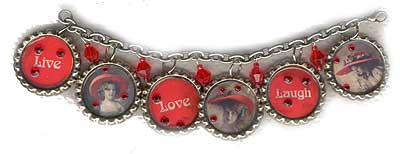
Here's a creative way to reuse / recycle bottle caps to make a cute charm bracelet like the one above.  Over at Go Make Something you can learn how!

 
How about something to make with those hard to recycle plastic bottle caps.  I found this pincushion tutorial over at My Little Mochi  


Are you a seamstress?  Do you refashion old items into new fashions?  Like me you may have looked at purchasing one of those *very* expensive dress forms and thought, wow, if only it wasn't so spendy!  Well Cut Out and Keep has a great solution to make your own CUSTOM dress form.  this is a 2 person project, so grab a crafty friend and make one for each of you.


The Storque Etsy's Handmade Blog shows us how to make this adorable little chipmunk toy by recycling a glove.  I'm thinking of trying a couple of these one for my granddaughter and another for my dog Echo the eco dog!


And we can't leave out one for the kitty cats.  Design Sponge has made an easy cardboard scratcher for her pretty kitty and you can make one too!


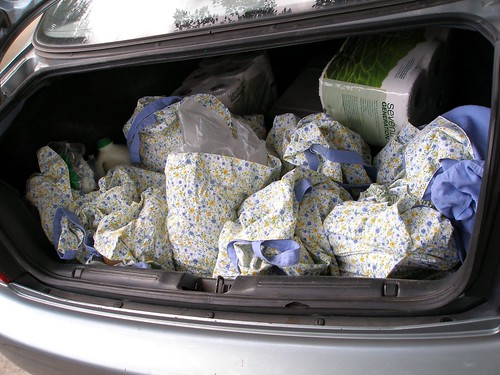
Ok this is my favorite one for making grocery bags so far!  Wisdom of the Moon teaches us to turn a repurposed sheet into enough reusable bags to bring home all of your groceries!  This one requires only very basic sewing skills, so no more excuses for plastic shopping bags!


Here's another craft you can do with those plastic bags you have collected in your kitchen. Lucky Ladybird Craft Blog instructs us all how we can repurpose them into baskets for decoration and storage


Friday, December 18, 2009

Recycled Christmas Cards to Gift Tags

I save everything.  Every little bow, ribbon or scrap of rafia that comes my way via gifts and packaging.  I have a bag in the laundry area where these things get accumulated throughout the year.  It's great because when it is time for me to wrap gifts I have a lot of recycled items to choose from to make the perfect presentation! 

I've also been saving Christmas cards that we've received.  Someone posted a great idea about making gift tags from recycled Christmas cards on the Facebook Fan page back when we were running our Green for the Holidays Giveaway.

I decided to combine my stash of bows and ribbons with that idea and create some gift tags for our canned food & goodie baskets we're giving out to our friends this year.


Gather your supplies. 

This is a pretty, easy, and earth friendly project you can do in a short time.  All you need are some scissors, a hole punch, a stack of last years cards, some ribbon and a pen.


Choose an overall pattern to cut out for your tag.
Be sure there's no writing on the backside of the picture.

Each card is different, so you'll just have to take a look and decide on a pleasing pattern for the shape of your gift tag.  This one I simply cut out following the over all shape of the main design on the card.  Once you decide on your pattern, cut it out using the scissors, then find a good spot in the design to punch your hole. 

Here's a few in process.  You can see I just cut them out
following the overall pattern of the picture.


Now add a cute bow made from your recycled ribbons


Add your message to the back

So spread your holiday cheer and feel good because you are recycling and giving a gift to the earth too!


Here's the tags I made!

Wednesday, November 25, 2009

Planet Savers, the next generation.

I was so thrilled this summer when my neice Samantha took an interest in making her own recycled bags.  She has several that I've made for her, in fact some of the cutest ones went home with her.  Even still she wanted to learn to make her own. 


Recycling runs in the family.  Here's Sammi learning
to make her own FatBottomBag recycled bag.

We spent an evening together sorting and cutting plastic bags into strips.  I explained how to hold her crochet hook and get her bag started. As she worked on her first bag, she told me how she recycles at home.  She even goes as far as cleaning up recyclables she finds in her neighborhood.  A budding environmentalist!

Another young person who is taking up the torch for the environment is my facebook friends son.  Kori purchased a bag from me a while back and she sent me my biggest compliment.  Her young grade school son Tyler wanted to let me know he was proud of me for helping the planet.   I was so touched with the compliment I actually cried!

This week my friend Mattie sent a photo of the bag her daughter Sarena made.  They have a FatBottomBag of their own and a Minibag from the recycle exchange and Sarena used those to come up with her own beautiful design for another recycled bag that she made for her mom.

Sarena's recycled bag!  Great design awesome work!


I'm loving making these bags and helping the environment.  I love that others are being influenced to do the same and make their own efforts to help.  I'm thrilled to have made a small difference in the lives of these young people and I'm proud of the efforts that they are making.

If you want to try your hand at making a recycled/reusable bag, check out my video tutorial and I'll show you how.

Sunday, November 15, 2009

More Recycle Crafts For Christmas


I love a homemade Christmas. One year I made all of our tree ornaments from fabric scraps turned into "lollipops" another year I crocheted and starched string snowflakes.

Each year I try to do something homemade for Christmas because I think that is what the holiday is really about, sharing the gift of yourself with friends and family.

This year I'm continuing with my handcrafted Christmas tradition with a recycling twist. I'm finding fun and fantastic ways to make recycled decorations and sharing what I've found with you.


Over at About.com, Sheri Osborn will teach you how you and your children can turn those old puzzles into very cute ornaments for your tree


Happy Bird's Crafting Haven has a real easy project for recycling your old cards into tags for Christmas.  You could use the same idea to make tree ornaments too!


Here's an easy and beautiful way to reuse your old scratched up ornaments

InsidiousNeth shows us a really neat oragami gift box to make in this YouTube video


Have an old computer keyboard?  Try this ornament made from the recycled circuitry.  Suprisingly beautiful!

Turn an old soda can into a beautiful 3 dimensional star ornament

Or you can make the whole Christmas tree out of cans like they did over at http://mdewtree.com/
Here's the video from YouTube


Heres another 3 dimensional star, make this one from recycled Christmas cards.

You can use recycled paper and then follow along with iespila to make a 3 dimensional snowflake


This might be my favorite one.... Recycle a wool sweater into an adorable polar bear ornament from Fun in the Making

You'll never believe these pretty stars are made from recycled plastic bottles!

WOW!  This is amazing. She just used glue, glitter, garland and Toilet Paper Rolls and made gorgeous tree ornaments!


Let me know your green holiday ideas and don't forget to enter the Green for the Holidays FatBottomBag Giveaway

Saturday, October 17, 2009

Recycling Tshirts into rugs


My wonderful fiance Ben is a clothes horse.  His closet puts my own to shame.  It is packed full of Tshirts many of which I've never seen him actually wear.  So after a lot of prodding and a little help, we finally went through his collection.  We saved some special ones for a Tshirt quilt and any that were stained or too thread bare to be donated to the thrift store became new recycle material for me.


I've had this project in mind for a while now.  A friend of mine here on the Island makes absolutely gorgeous rugs from old bed sheets.  When I was visiting one day, I noticed that she was using the same crochet hook that I use for my mesh bags to hook the rugs and my imagination started working on what other items could be recycled into rugs and I settled on Tshirts but the same concept could be used with lots of materials.


These little 2-3 foot area rugs are great for bathroom mats or as a desk rug in front of the computer chair.  It would be easy to adapt this for larger area rugs as well.  I think the best thing about this project is how quickly they come together, making it a great project for a quick but thoughtful handmade gift. 


Ok, so here's how you can make your own recycled Tshirt rug.  You will need:
  • 6 to 9 old tshirts.  Use plain tshirts or those with little printing
  • Sharp scissors
  • 1 size Q crochet hook
  • 3 to 4 hours to spare


Lay your Tshirt out on a flat work surface.  Fold it in half sleeve to sleeve.


Cut a straight line across the Tshirt from armpit to the fold.


Cut another straight line across the hem of Tshirt.


Save the sleeve area for a future project and dispose of the hem line.  Now you're left with a folded tube.  Fold it again from edge to edge, but not quite in half.  You can see in this photo I've left about an inch at the top edge. 


Using sharp scissors, begin cutting 1/2-3/4" strips in your Tshirt tube, but don't cut it completely through.  Stop before cutting through last inch like this:


Continue cutting until you've cut the whole tube of the Tshirt.


Open the tube up.  You will see it's still connected at 2 of the folds.  Starting on 1 side you will cut one end and begin to unravel it into 1 long strip.  At the folds, on one side cut straight across, and then at the next fold you'll cut it at an angle to make 1 continuous strip.


When finished cutting, you should have 1 long strip of fabric like this:


Starting on one end of your strip, begin stretching the fabric.  It will form itself into a tube as you do and your finished yarn will look something like this:


You're Tshirt yarn is now ready to use in any crochet pattern.  Roll it up into a ball and start on your next Tshirt:


To make rug:


Choose yarn ball for your center color.  Using your Q crochet hook, chain 4.  Connect to first loop in chain with a slip stitch.  This will form a ring of stitches.


Single crochet 8 stitches through the center of your ring.  Slip stitch the 8th stitch to your first stitch.  Now you have your first round.


Chain 1 then Single crochet through the first stitch from the last row.  Single crochet 2 stitches through the second stitch of your last row.  Continue around this row with every other stitch getting 1 single crochet and evey second stitch getting 2 single crochets.  When you've worked all the way around, slip stitch the last stitch into the first stitch.  You've completed your second round.


Chain 1 then single crochet 1 in the first stitch of the second round, single crochet in the second stitch then single crochet 2 stitches in the 3rd stitch of the last round.  Repeat around the row.  When you get to the last stitch in the row, slip stitch to the first stitch completing your round.


Chain 1 then single crochet in the first 4 stitches with 2 single crochets in the 5th stitch.  Continue this all the way around and slip stitch the last stitch in this row to the first stitch. 


Chain 1 then single crochet in the first 9 stitches.  In the 10th stitch put 2 single crochets.  Continue this pattern all the way around to then slip stitch to connect last stitch to the first stitch.


Chain 1 and continue the pattern from the last round.  Keep going until the rug is the size you want.  Knot the end and work in the tails.


At any time, change colors or add on tshirt yarn by simply tying a square knot to connect the 2 ends.  Leave the tails and either clip or weave into your work at the end.


That's it!  So easy and so pretty too.  Here's the first 3 rugs that I've made


There's still plenty of time to make these as your christmas gifts, so get in your closets and pull out all those old Tshirts that you never wear.  Your handmade rug could be a double gift, by recycling you are giving a gift for your friend and for the planet. 


*****UPDATE: 1/24/10******
So what do you do with those sleeves and Tshirt Tops?  Find out how to make reusable produce bags and stop collecting needless plastic bag waste!  To find out how, check out Kristy's post over to Textiles4You

Monday, October 12, 2009

Fall Garden Clean Up Craft

Here in the Pacific Northwest we have 4 seasons Winter, warm and wet, summer, cold and wet.  This year we've been enjoying an unusually dry autumn and so I've been putting off my outdoor chores in favor of my canning projects.

After hearing the forcast for rain to come later this week, I thought it would be a good time to get out in the yard while it was still dry. I grabbed my gloves and pruning shears and started cutting back this summers growth.  I have a large garden area in my yard full of herbs and flowering perennials. Because I live on a rocky hillside, I have to choose plants that can thrive in the limiting and sometimes difficult soil conditions.


One flowering perennial I've been placing up the hillside is called pearly everlasting (Anaphalis margaritacea). It's a native plant in the aster family and seems to thrive where soil conditions are poor.  It's not a super showy flower, but it blooms in large clusters and stays in bloom from about July - October.  As the name implys this flower is great for drying and lasts nearly forever once dried.

Today I made a wreath from the pearly everlasting that I was cutting back.  Here's how to make one of your own.


For this project you will need a grapevine wreath form.  You can easily make one with your own grapevines by winding them into a circular form and interlocking the ends.  You will also need a pair of scissors, some wire, wire cutters and a whole lot of cut pearly everlasting.  I filled this garden bench twice with plant matter.


After you've gathered your materials, you will take small handfulls of the flower and strip the leaves off the stems.

Then using your wire, wrap this cluster around the grapevine wreath and pull the wire tight.


Then you'll need to trim off the excess stems.


Keep working your way around the wreath in the same direction. 

Add another cluster of flowers, wrap in wire and trim excess stem, be sure to overlap the flower clusters over the previous clusters stems to form a full and lush wreath.


When you've filled the wreath form, secure the wire to the grapevine and make a loop in the wire on the back of the wreath for hanging.


The white wreath is quite nice on it's own, but I also had some hydrangeas in bloom, so I added some to the wreath for extra interest.  You can use other flowers too or decorate with rosehips or anything else you can imagine.


This is my finished wreath.  It turned out beautiful and looks great at our front entry. 

Green tip for this project:  Place your trimmings, leafs and stems into the compost bin and by next spring the compost you create can feed your new garden flowers.

Attn: FACEBOOK FRIENDS & FOLLOWERS:  To see photo how to click here


AddThis

Share |
Related Posts with Thumbnails