Wednesday, March 31, 2010

It's Wednesday, let's see what's growing on!

Don't be mistaken, Living Green in a Colorful World is not a "gardening blog"  but spring has me buzzing the organic garden like one of the newly awakened bees I see exploring the yard.  So I'll try to limit garden posts to my Wednesday, What's Growing On posts, with an occasional extra post if we've done something really exciting in the garden. 

That said, here's what I have to report from the veggie patch for this week:

Ben and I finally came to an agreement on the placement for the new boat garden.  We placed it with bow up against a large boulder and to the left of where Ben and Echo are standing I moved some earth to create a terrace step down to the already established part of the garden.  Ben brought home several yards of soil mix already and he used some to fill this boat planter.  The boat will be home to our Roma tomatoes in June, but for now I've planted some Walla Wallas along where the boat benches are and I'll throw in some lettuce and radishes that should be ready for harvest just in time to make room for those tomato starts.

On the other side of the boat where I made the terraced steps, I stacked up some of the soil along the bow.  Then I transplanted some garden herbs (mint, oregano and lemon balm) in there.  I then stacked rocks over the top of the soil mound to prevent erosion.  Today I noticed that the herbs are starting to pop out from the cracks between the rocks.  Just as I'd hoped!

Did I mention my new outdoor sink for washing veggies?  Well it still needs to get cleaned up and the water will have to get hooked up later (we'll be using a reclaimed water system of some kind), but the sink framing was built by Ben and custom sized for me!  Yay!  Finally a shorty sink for a 5' 3" me! This is a 100% green project right here.  The sink is reclaimed from the trash heap and the water used for washing will be recycled into the garden as irrigation.  Along with that, the compost pile is right nearby, so prepping my veggies will be a breeze and it will keep dirt out of the kitchen pipes and the home septic system!  The added bonus, I have a kick ass view of the Hales Passage to enjoy while doing my garden chores.  Island life rocks!


One of the joys of the garden is the interaction with the local fauna.  I was excited to snap some photos of this pileated woodpecker that came for a visit.  These large and strange birds often hop about our backyard from tree to tree searching for grubs and insects to eat.  They even eat from our suet feeders which I fill with my own homemade suet treats that include local and native bird foods such as berries and rose hips.  They tend to be pretty camera shy and quick to startle, so I feel lucky to have snapped these shots even if they are a little on the blurry side.  In the background, you'll note our fern fronds are just coming open.


Tuesday, March 30, 2010

Bring Some Spring Green Indoors


Bring some spring cheer indoors
Green is my favorite color! Green for the Earth, Green for growth and especially Green for spring! I love to watch the new foliage come out in shades of chartreuse and then harden out to emerald, evergreen and blue green.

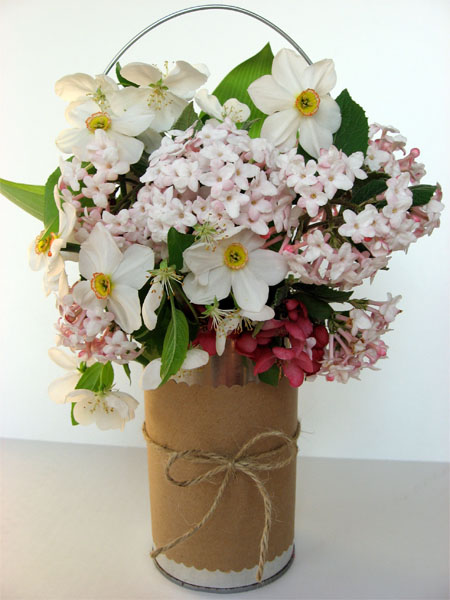
I love to bring a little of that spring green indoors too! Today I'm gathering foliage with different shades of  green throughout the yard to make a nice little arrangement. I know most bouquets are full of brightly colored flowers with very little foliage, but it doesn't have to be flowers to be beautiful!  I don't have much in bloom right now, but I do have a lot of green going on in the garden.

To create a spring green bouquet, look for interesting textures, different glosses and shades of green.  Include some branches in bud and others with fully opened leaves and choose leaves of varying sizes and even some twiggy dead wood.

Grab a vase, jar or other interesting vessel and starting with the largest leaved branches begin filling.  These larger leaves will help form a sort of foundation from which to build. Then begin layer in your branches working from the largest leaves to the smallest.

A rule of thumb for floral arrangement is to work in odd numbers to create an appealing arrangement. However, this is a creative endeavor, so do what looks good to your own eye. You may want to clump 1 type of foliage together and use another type to spread throughout the arrangement. Also, think about creating different heights within the arrangement and step back from time to time to view it from a different perspective. 

I used Salaal as my base in this arrangement. The larger thick leaves of this native plant form a network of support to place my other leaves. Next I added the dead wood and then began layering in the other leaves from there to create a full lush arrangement.
The plants I used were Salaal, Oregon Grape, Sea Breeze branches,
Thimble Berry, Huckleberry, Butterfly Bush and Maple.
You can use whatever foliage catches your eye.
I did another arrangement using my houseplant cuttings.  It came out really beautiful and is a nice addition to the living room for color while these cuttings get new roots. 
A spring chore of taking new cuttings from my
houseplants became this pretty arrangement.
When the roots are developed, I will break this down and use these propagated starts to make new houseplants for myself, others for gifts and still others to maybe sell at the local farmers market this summer.

So as you can see, you don't have to have the bright colored flowers of summer to create beautiful bouquets. Use whatever is on hand and in season. The only limit is your own imagination.


Monday, March 29, 2010

Another learning opportunity through WMMSN

As a volunteer with the Whatcom Marine Mammal Stranding Network, I have a lot of neat opportunities to learn new and interesting things related to our work of helping with stranded marine mammals. 

This week was no exception.  On Saturday I, along with other volunteers from WMMSN and Northwest Wildlife Rehabilitation Center, attended a training class to learn how to triage for distressed seal pups. This training was taught by Penny Harner, a staff rehabilitator from Wolf Hollow Wildlife Rehabilitation Center.  

You may remember Wolf Hollow from my post about the release of Chitenango, our little seal pup rescued from Lummi Island last year.

Chitenango when found on the beach at Lummi Island

Chitenango and friends being released at
San Juan Island after rehab at Wolf Hollow.
Penny taught us how to administer some basic first aid for instances when we might need to keep a seal pup for a short time en route to a rehabilitation facility.  She presented us with all kinds of information on how we could best help a distressed seal pup including housing, wound care, administering fluids if necessary & heating and cooling a pup. 

What a fantastic opportunity this was to learn more about the care of seal pups.  I'm so glad that I am able to volunteer to help and learn so much along the way.

As a member of the general public, should you come across a stranded marine mammal, remember it is against the law to approach them or harass them in any way. Remember, your strolling through their natural habitat!  The best thing to do is stay back, keep dogs away and observe.  If you notice that the mammal is in distress, contact your marine mammal stranding network and pass on as much information as you can note that might help the volunteers from the network to locate and assist the mammal.


P.S.  Seal pup season is fast approaching and the Whatcom Marine Mammal Stranding Network will once again be busy responding to seal pup calls.  Now is a great time to help support our efforts. Donations of any amount help us to purchase equipment such as carriers, ropes and other items needed for stranding responses and to pay for trainings like the one I attended this week.  Donations $25 and receive your very own Whatcom Marine Mammal Stranding Network Tshirt. 

Sunday, March 28, 2010

Sunday Simple Steps Planet Saver

Here's a cute cartoon I found on YouTube out of the UK to help us all make simple changes with big impact for reducing our carbon footprint


Some easy ways to make a difference.  Are you doing these things already?   What else are you doing to simply save the planet? 

When we all do our small part we can change the big picture!

Saturday, March 27, 2010

Silent Saturday

Don't forget, tonight is Earth Hour! From 8:30 to 9:30 pm, join me and turn your lights off for the earth!

Friday, March 26, 2010

Friday Finds

This week for Friday Finds I've been looking for things you can do with cans, both aluminum and tin cans.  Of course most municipalities have curbside pick up for cans, some states even have a deposit to return cans and bottles.  Recycling is a great option, but the 3 Rs are Reduce, Reuse and Recycle, so I always like to find interesting and fun ways to reuse items before they go into the recycle bin.


Here's a neat one from Little House in the Suburbs to make these leaf ornaments from aluminum cans.  There are more photos over on the site and they look beautiful adorning her holly bush


10th Muse Studios used the same concept to show us all how to make some cute pop can flower magnents at her blog


The new new blog has a great tutorial to use aluminum cans for pendants and jewlery. 


This one's not a tutorial, but it's a fabulous Haute Coutoure dress made from all kinds of recycled materials including cans, labels, bottles and bags.  I surely wouldn't want to wear it, but it's always neat to see this artistic visions done with recycled materials.  I wonder how much this dress weighs??


Susan Beal at Craft Stylish has shared her idea to recycle cans along with wire and beads to make pretty little hanging baskets for a spring birthday or garden party.  I love this idea your decorations are recycleable and reusable and living flowers!  Great idea Susan!


Remember May Day when you were a young girl?  I do!  I loved making those little paper baskets and filling them with whatever flowers were within my reach.  I wonder if those neighbors ever asked themselves how many of the flowers in my little May Day gift basket were harvested in their own yard?  :0)

Here's another use for a recycled can from Skip To My Lou.  You can do this one with your own children or grandchildren and pass the tradition of May Day on to a new generation, while teaching a valuable lesson in recycling and reuse too!


Lady Gaga actually wore hers out and about, but you can use cans as hair rollers to form big beautiful curls.


Martha Stewart has a really cute "robot dog" idea that you can make from tin cans.  He's even got little roller feet, so your little ones can take him for a walk!  Very very cute!


You can even make your own camp out cook stove with these video instructions!

I'm sure there are a lot more fun, useful and intersting ways to repurpose cans.  Do you have some good ideas or links for this type of project?  Share them with us in the comments!


Thursday, March 25, 2010

Earth Hour is coming up quick! Are you ready?

Earth Hour is coming up.  On March 27th we will again have a chance to celebrate the earth with an hour of lights out.  Here's the scoop from the Earth Hour web site:


"On Earth Hour hundreds of millions of people around the world will come together to call for action on climate change by doing something quite simple—turning off their lights for one hour. The movement symbolizes that by working together, each of us can make a positive impact in this fight, protecting our future and that of future generations. Learn more about how Earth Hour began, what we’ve accomplished, and what is in store for 2010."


A simple step with a big impact.  Will you be celebrating Earth Hour this year?


Wednesday, March 24, 2010

What's growing on Wednesday


We had some nice sunny days this weekend, so of course it was back to the garden.  If you've been reading along my gardening journey this year, you know I've planted all the beds already this year.  That could be a problem!  Well no problem here, my wonderful other half, Ben made an extension to the garden area and got the deer fencing up too!


The hard work is driving the metal posts in to our rocky ground.Once he got those in then he added wooden studs to support the fence high enough to keep out any determined jumping deer, then he added the netting and tied it into the fence between our house and the neighbors. This almost doubles our planting area!


As for me, I started on a few random garden chores. I trans planted some oregano into movable pots.  I'll use these as bee attractors and move them around to whatever plant I have in flower.  I planted a few pots of bulbs to add some beauty to the garden while bringing the pollinators in too.  One is a beautiful purple daylilly that I thought was unique, another is a pot full of hardy gladiolas.  The box said they are deer resistant, but I'm not taking any chances!  They will add some pretty color in the veggie patch too where they will be safely fenced away from hungry deer.

I pulled out my dahlia pots from last years spot.  I figured they were probably dead from freezing over the winter.  I had meant to pull them out and store them inside, but just never got around to it.  As I started pulling out what I thought would be dead tubers, I was surprised to find that most of them were actually still firm and viable!  Hooray!  So instead of recycling the soil and pots, I just moved them into a sunny spot and added a tomato cage to the pot.  The cages work quite well as support for these bushy beauties.

I was in and out of the garden shed  throughout the morning and saw lots of birds munching away on my homemade suet cakes.  I was able to snap a nice photo of one little chickadee, but when the Northern Flicker was eating, he got sight of me and flew off before I could get the camera out.

This gardening hobby is a lot of work, but that's ok by me.  I enjoy it so much and the added bonus is I'm getting a lot more exercise.  I even had to tighten up my belt the other day!


Tuesday, March 23, 2010

Creating a trellis for a potted climbing vine

I purchased a new Jasmine plant this week.  Oh it's so wonderful with all the beautiful fragrant blooms and it should bring the hummingbirds and bees in for a closer inspection too.

I made a quick climbing trellis for my sweet little vine using some bamboo from my garden.  I started with 2 fairly straight bamboo stalks and cut them to size.  Then I cut 4 or 5 cross bars from another stalk.  With a little wire and patience I formed a small ladder for my Jasmine to vine around. 


And speaking of humming birds, they are back.  Time to wash the feeders and make a fresh batch of nectar.


For more info on hummingbirds and their habits check out hummingbirdworld.com

Here's a video of hummingbirds I filmed in my backyard last year


Posted by Picasa

Monday, March 22, 2010

My Blog is Carbon Neutral

Speaking of planting trees....  I was catching up on my reading over at  Going Green Crafters and Artists when I found this program for neutralizing the carbon footprint of their blog.  What a great idea!  I want to have a Carbon Neutral blog too! 

Easier said than done, right?  Well not really, Mach's brun (rough translation:  Make it Green) really is making it green by offering to make any blog carbon neutral!  This German program is planting trees in patnership with Arbor Day Foundation at Plumas National Forest in Northern California .  This is in an effort to reforest the area that was devistated by forest fires back in 2007.


So Yay!!!  By making my blog carbon neutral I'm helping make the world a little greener. This spring they will be planting  Douglas-fir, red and white firs, and incense cedars alongside ponderosa pine and sugar pine trees. These new trees will help prevent soot and soil runoff into Plumas’ precious water supplies. And one of those little trees is forever linked to my blog :0)

Here's my new badge to show off my neutral status!

carbon neutral coupon with kaufDA.de

Don't have a blog of your own but want to participate in reforresting?  Don't worry, Arbor Day Foundation has many other ways you can help too!


Sunday, March 21, 2010

Sunday Simple Steps Planet Saver

Beautiful and majestic, trees are an important part of a healthy eco-system. Have you ever wondered how trees are helping with offsetting Carbon in our atmosphere?  Well here's an illustration from US Environmental Protection Agency that can help explain the process.


So this week for a Sunday Simple Step, how about planting a tree? 

Maybe there's a spot in your back yard where you need a little shade, or at your summer cabin.  Are you a renter?  Don't worry there are ways you can plant trees too.  Check with your county extension office for programs that are planting in parks, along rivers and streams and even in urban areas.  Or if you're too busy, or unable, maybe you can support a local group that is working to plant trees in your area.

Why not take the whole family and spend a day enjoying the outdoors and helping your eco-system.  I did!  About 10 years back I stumbled on a group that was working to restore a creek bed in a  private cemetery here in Whatcom County.  This area had been clear cut many years before, right up the the banks of the stream that meandered through the property. 

It was a fun day working with a group of about 15 volunteers we replanted all along the stream with native shrubs and trees.  It didn't take long when we shared the work load and afterwards we enjoyed a potluck luncheon with story sharing and good times. 

The trees we planted were quite small at the time, seedlings really.  The group was able to obtain the seedlings from the county extension office for little or no charge as part of a salmon spawning beds rehabilitation program. 

Now, years later, those little seedlings are developing into a beautiful array of native trees and shrubs that are doing a multitude of duties like helping restore habitat for salmon and other fishes, wildlife, beautification of the area, and as the trees mature they are capturing CO2 from the atmosphere and giving back life giving oxygen.

So get out and be a tree hugger or just a tree planter.  Just like Johnny Appleseed, your contribution will be a legacy of love even long after your gone.

Saturday, March 20, 2010

Friday, March 19, 2010

Friday Finds

This week I've been thinking a lot about all those plastic bottles.  We try to buy things in glass whenever we have a choice, but so much of what we use comes in plastic bottles.... juice, syrup, mayonaise.... seems like almost everything is packaged in plastic bottles!  Fortunately our area has an extensive curbside recycling program that includes many types of plastic, but even still I thought it might be fun to look at some plastic bottle reuse craft projects.


Building Nemo
Here's a fun one for the kids that I found over at National Wildlife Federation.  It requires some adult help, but is a great opportunity to talk with your children or grandchildren about reuse and recycling.  Also a great lead in to talk with older children about the North Pacific Garbage Gyre and the problems of plastic pollution. 


Here's another rainy day project for kids, or doctor these up for a more adult theme. 


Here's some reused bottle crafts for the garden

Mr Brown Thumb shows us how easy it is to start seeds in a plastic bottle seed starter


Make a full size greenhouse using recycled plastic bottles.  It can be done, these kids did it!


The Family Corner has easy instuctions for turning a 2 liter bottle into a bird feeder with a perch


Water your tomato plants slowly and directly to the root. Poke holes around a plastic bottle ( I like a 2 liter for this)  bury the bottle into the ground along with your tomato transplants.  Now when you water, fill the bottle and the water will seep out the holes directly at the root of your tomato plants.  This will also help prevent blight which can happen when you get water on the foliage of your tomato plants.


Create a Cloche.  Cut the bottom off of a plastic bottle, then when you put out your transplants, cover them with this "dome" of plastic to form a cloche (greenhouse effect).  Be sure to remove this as the plant matures and the weather gets warm.


Instructables has a great tutorial for an herb garden grown in plastic bottles


I haven't tried this one, but anything to keep the slugs out of my garden is worth a try.  My Zero Waste has a blog post with video to make a slug collar for your seedlings


Make your own "wall of water" plant heater.  Fill jugs with water and arrange them in a ring around plants. When the weather warms, use the water in the jugs to water your garden and save jugs to use in the late season to extend your growing season .


Problem with wasps or yellow jackets in your
yard?  Try making this do it yourself wasp trap using a plastic bottle.


Thursday, March 18, 2010

Networking, and new friends

I thought I'd use today's blog post to talk about some of the places I've been networking on the web.  We all know about Facebook , Twitter and Myspace, but there are a lot of other places on the internet for making new friends, networking and spreading your message or getting exposure for your online shop.


For all you crafters, have you joined me on My Craft Corner yet?  The corner is a social network of crafters of all mediums.  They have great featured artists each week and lots of other features like groups, a forum, and tutorials.  I've made a lot of new connections over there with lovely crafters and you can too! 
Do you knit, crochet or work with yarns?  Ravelry is a place for you!  I'm not sure how many total members there are, but anytime I've logged in to my Ravelry account there have been nearly 3000 other folks logged in Ravelry!  That's a lot of support!  With your Ravelry account, you get a profile page which features your general profile info along with a screen shot of your webpage and photos of projects from your notebook.  Speaking of the notebook.... This unique feature allows you to share and track your progress on your needlework projects!  They also have a stash organizer, groups, forums, and even free patterns!

Craftplace.org is a new one for me.  I recently joined.  I haven't had a chance to explore all the features yet, but what did draw me in was the connection to hundreds of craft ideas.  They have resources like craft tips and links, groups, projects, and more. 


Earth Friendly Marketplace is a great network of eco minded crafters with online shops.  I love this network because I love connecting with other earth friends!  Here you can create your profile page, add friends, join groups, add photos and more!


Friends of Recycling is a social network for just that, people who are friends of recycling.  You know I had to make my presence on this one!  If you're a friend of recyling join me here.

So that's a few of the resources I've found for finding new friends and promoting living green and FatBottomBags.com   Let me know in the comments if you have a great social site that I've missed here.

Happy Networking!

Wednesday, March 17, 2010

Happy St Patricks Day!

Erin Go Braugh!  Ireland forever! 

Today's one of those lovely holidays that celebrates one culture while embracing all.  You know what they say, on St Patricks Day, everyone is Irish.

My maternal Grandma used to hold her thumb to her first pinkie joint and say "We've got a smidge of Irish, that's why we're lucky".  I love it!   Years later I learned that my paternal Grandpa was of Irish decent too!  So today I say, Kiss me I'm Irish!

Enjoy your green beers and green gear, and remember to go green everyday!


AddThis

Share |
Related Posts with Thumbnails